How to use CosmoNote's interface
CosmoNote is an web-annotation tool used to mark musical structures created in performance.
Table of Contents:
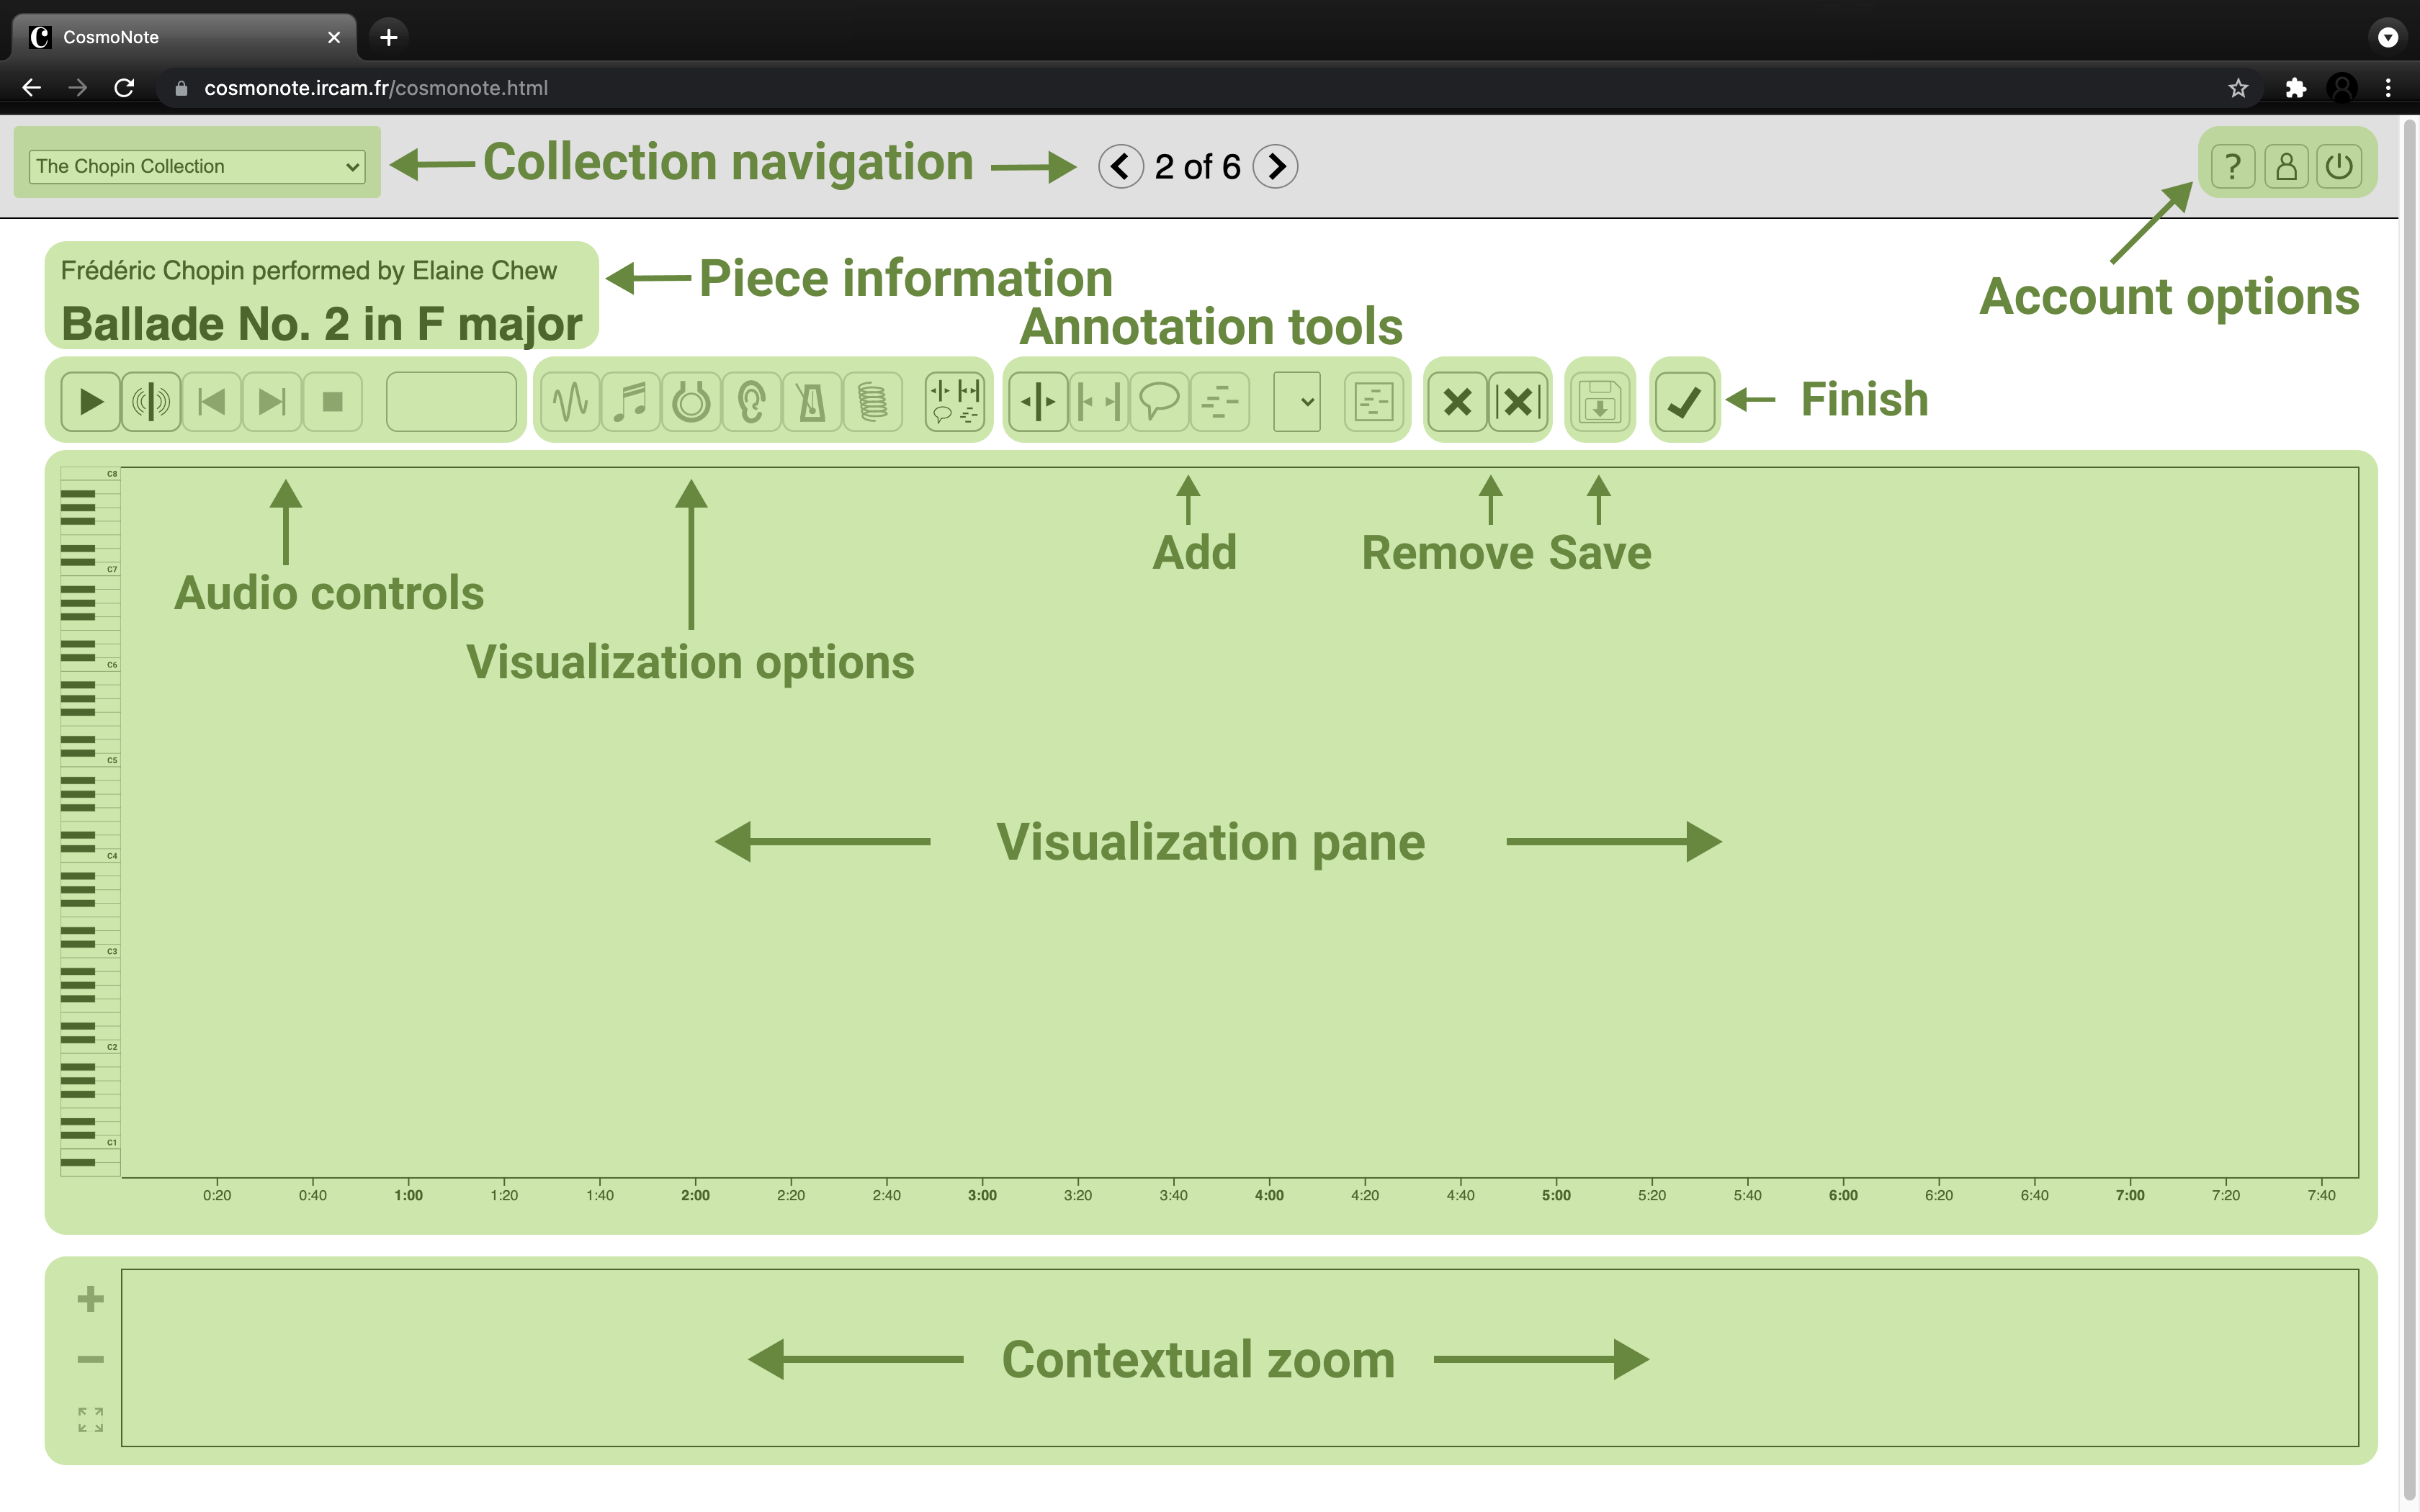
These are the elements in the main screen of CosmoNote:
Navigation and account
The upper part of the screen tells you details about the current piece, whether there are more pieces to listen to and lets you log out or deactivate your account.
Collection navigation: A collection is a group of pieces you can annotate. Available collections are shown as tiles. Click on a tile to see a collection. Each collection has a title, a thumbnail and a description. To go back to the tile view, press the back button at the top left of the main interface.

Piece navigation: The current piece and the total number of pieces in a collection are displayed at the top center; you can move through them using the arrows.
Piece information: For each piece, the site will display: Composer, performer, title. This can be disabled for specific studies.
Account management: On the top right corner you can use these buttons to disable your account (left) or just log out (right)
Annotation instructions: This button gives more information about the annotation task
Interface Modes
All your interactions with the site happen in one of two modes:
The play mode
Lets you hear the music and use some keyboard shortcuts to annotate. To enter this mode you click the Play button or hit the space bar. To exit this mode you click the Stop button or hit the Escape (Esc) key.
The annotation mode
The music is stopped and your mouse is your main annotation tool. You enter this mode by clicking on any of the annotation tools (described below) or by exiting the Play mode.
Playback Controls
These buttons belong to the Play mode and they let you control what you hear. Many of these will be familiar from any musical player you've encountered before.
Play/Pause: Click or press space to play, pause or unpause the audio reproduction. A green playback head that follows the audio will appear.
Boundary sound: Press this button to enable or disable a sound that's played at the time you placed a boundary.
Previous/next annotation: Click to move the playhead to the next boundary annotation.
Stop: Resets the position of the playhead to the start, stops the reproduction and exits Play mode.
Annotation Tools
What makes CosmoNote special is the ability to annotate music in a visual way.
Boundaries
The boundary tool creates vertical lines by clicking with the mouse on the visualization window or by pressing the 1, 2, 3, 4 keys while audio is playing.
In CosmoNote, a boundary is depicted by a line marking a single time location; the width of the line and the darkness of the line color are associated with the boundary levels. To account for different degrees of change that can constitute a boundary, there are four levels of you can choose from, in ascending order, from 1 to 4.
Marking boundaries
To mark a boundary you have two options:
Keyboard (Play mode)
Simply press [1], [2], [3], or [4] on your keyboard to mark boundaries while the audio is playing. The level of the boundary is assigned by the key you press.
Mouse
- Select the boundary tool
- Click at a particular time point (level 4 by default)
Selecting and editing annotations
- To select any annotation, you simply click over it with the mouse while in annotation mode.
- To change the boundary level, select a boundary and then change its level from the dropdown list shown below and in the tools menu.
- To move a boundary, click over it and drag it to its desired location using the handles on top.
You can also delete annotations and save your work using these buttons:
Delete current: Click to delete the selected annotation(s).
Delete all: Clicking this button will delete all your annotations after confirmation. Be careful!
Save: Click to save your current annotations.
Finish: Click to freeze the current state of your annotations for the current piece and submit them for analysis.
Visualizations
CosmoNote is capable of displaying several layers of information about musical data. All of them are displayed as a function of time. There are 6 main visualizations:
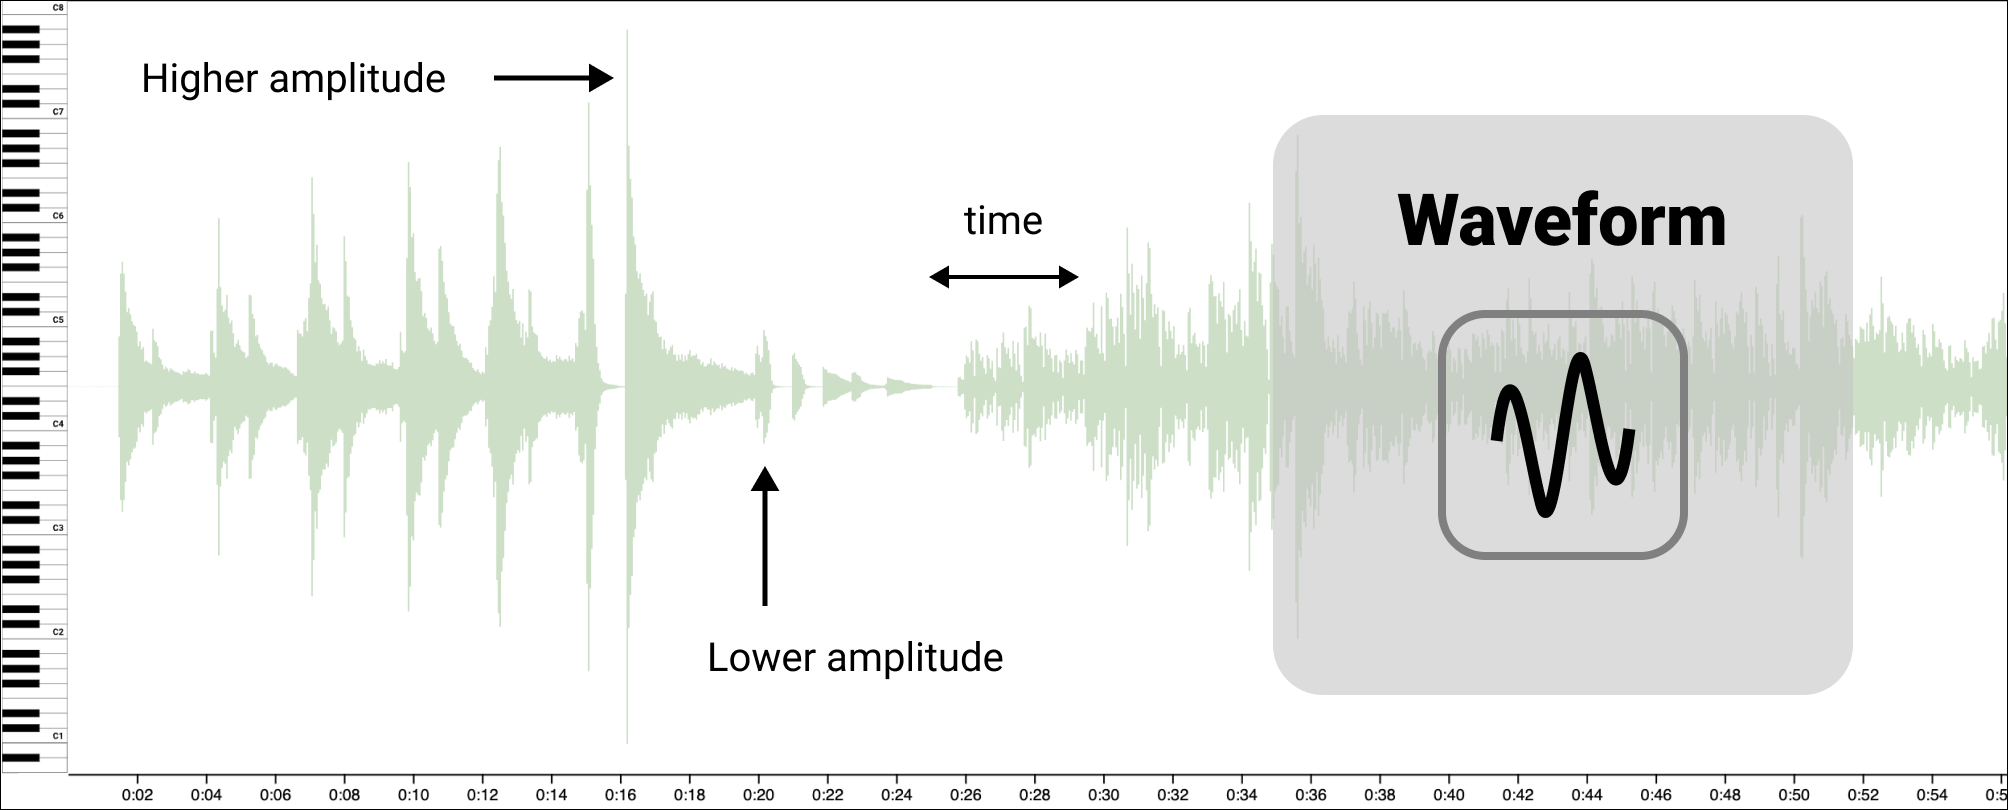
The waveform represents sound intensity variations as vertical pale-green lines. The horizontal axis depicts time, the vertical axis the amplitude of sounds.
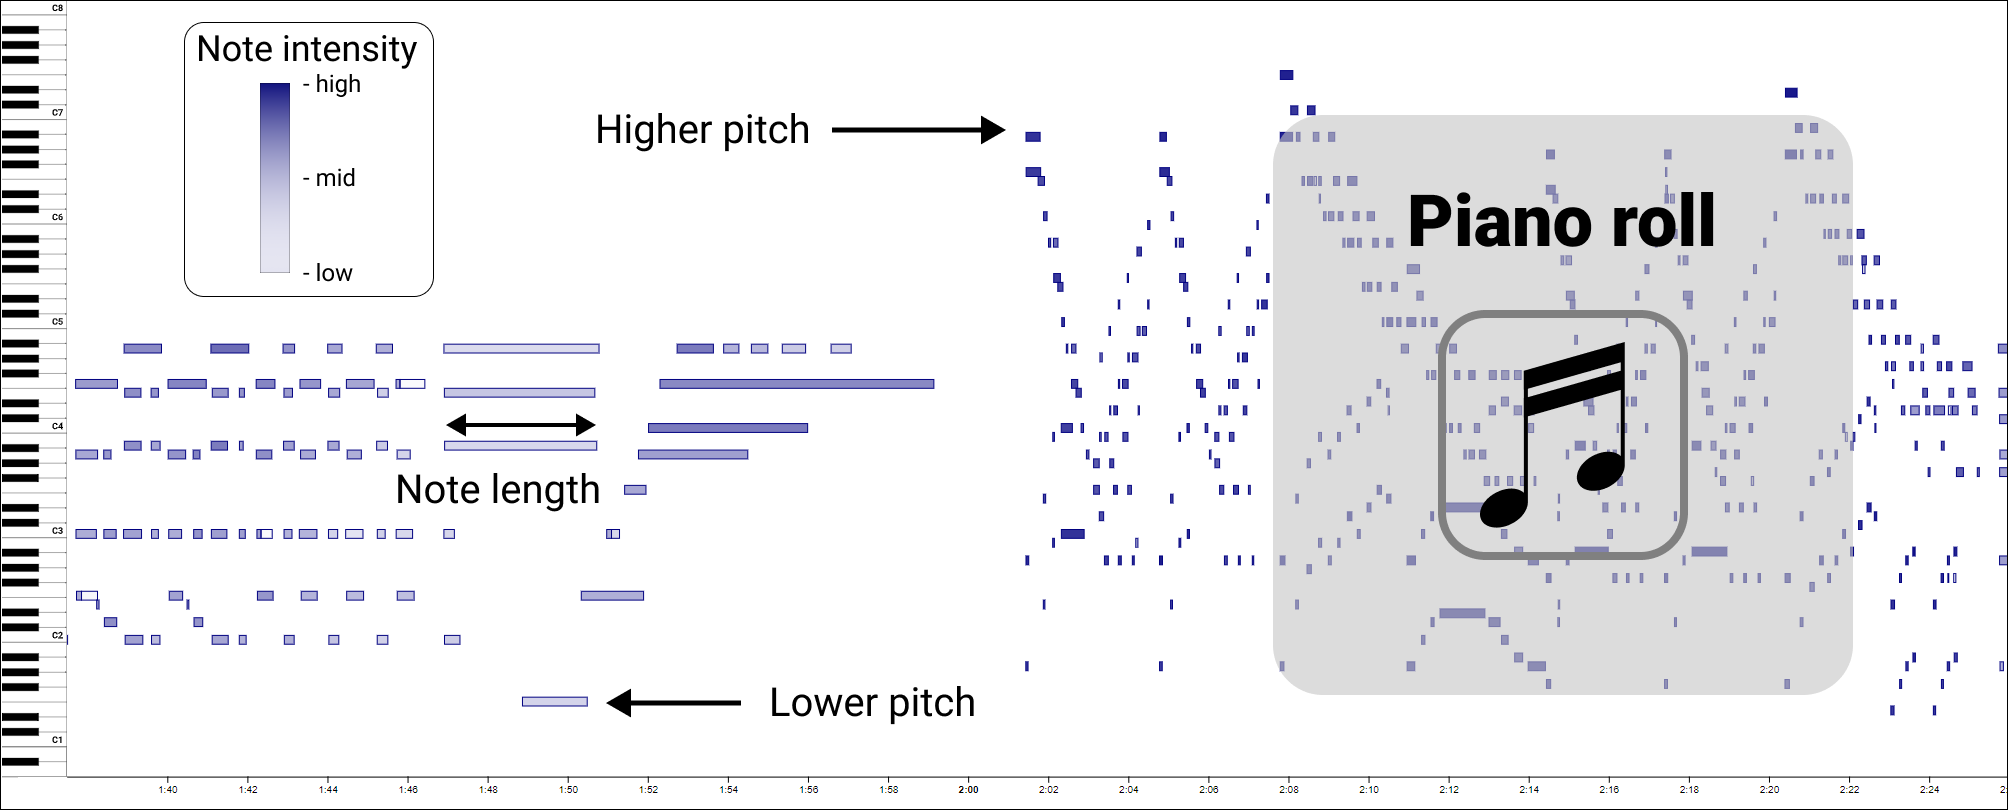
The notes of the recorded performance are represented as rectangles. The horizontal axis depicts time, the vertical axis the pitch (frequency) of notes. The darkness of the note color denotes its intensity.
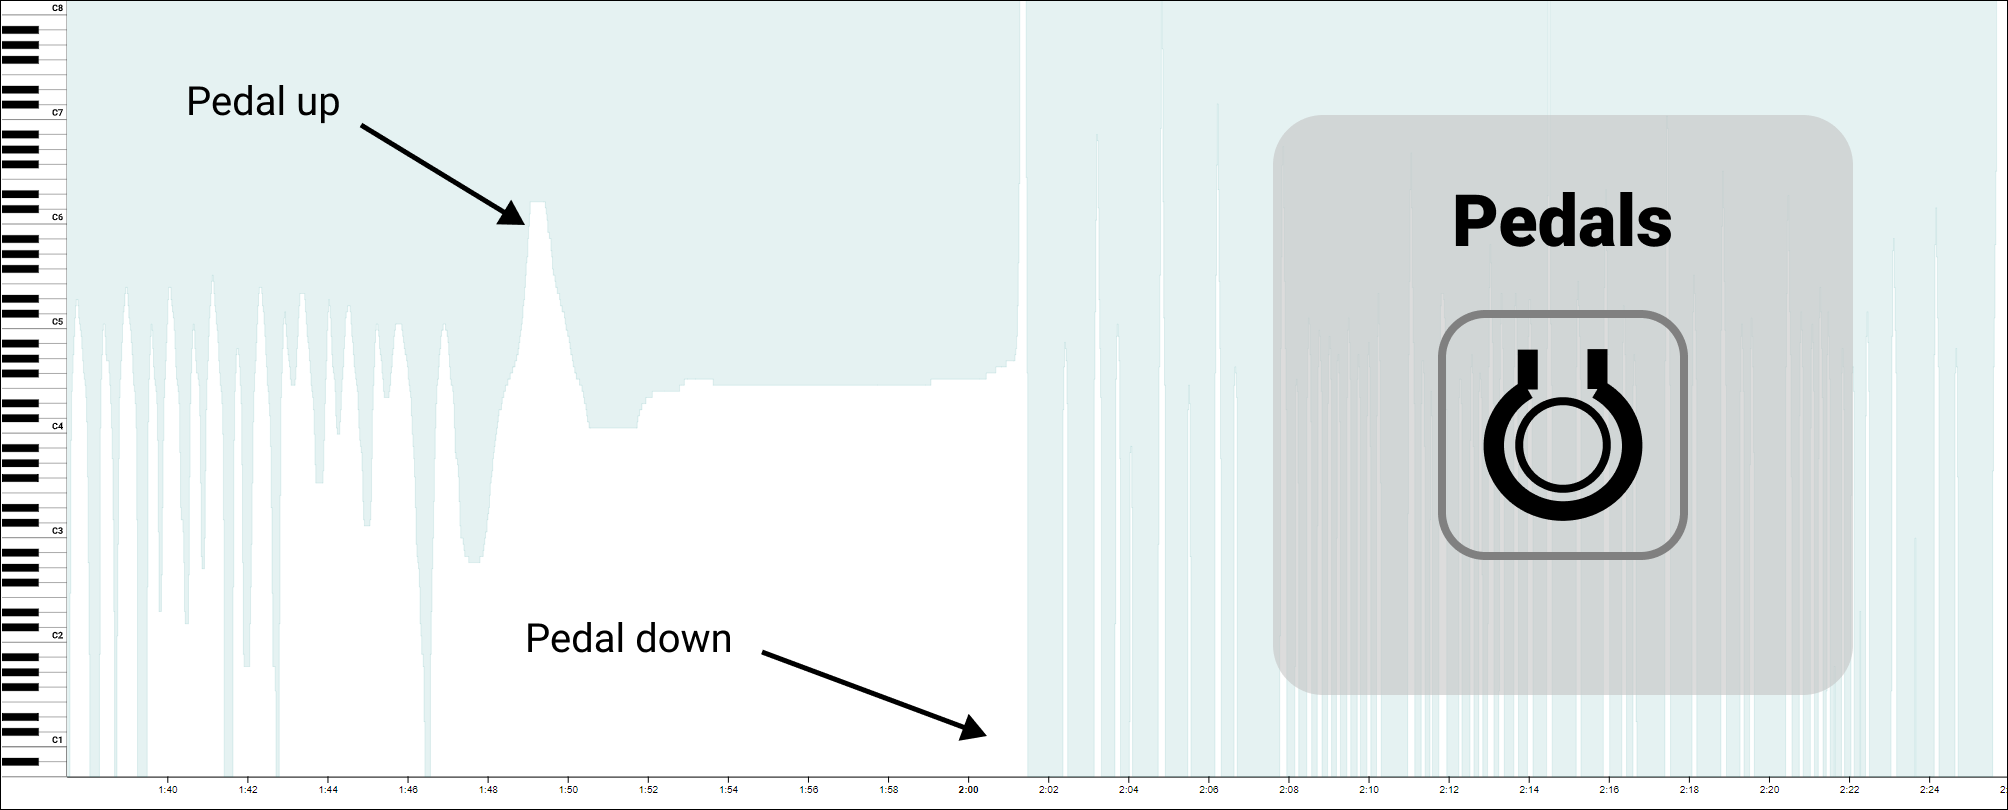
On a piano, the pedals can change the sound produced by the instrument. This visualization shows how deep the performer pushed the sustain pedal over time. There are three pedals on a piano:
- the sustain (right) pedal allows the notes to ring freely and for the sonorities of different notes to merge;
- the soft (left) pedal softens the sound of the notes and changes its timbre; and,
- the sostenuto (middle) pedal enables only selected notes to be sustained.
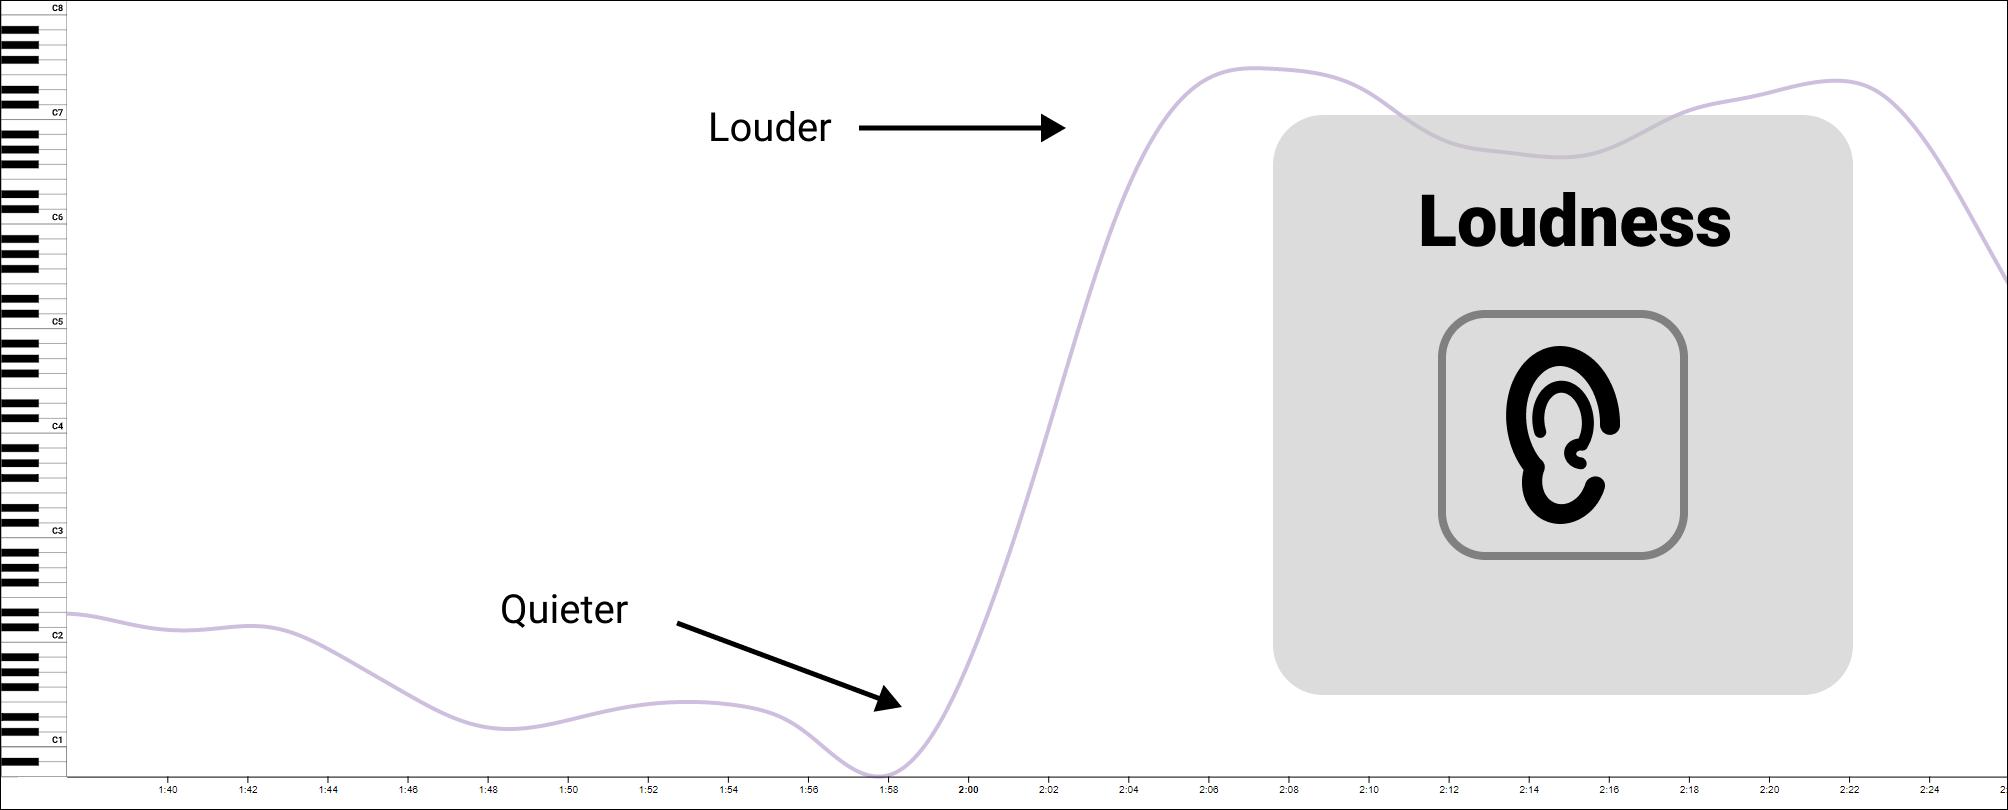
Loudness is used to represent the perceived intensity of a sound. The higher the curve, the louder (more intense) a given passage is in a piece, and vice versa.
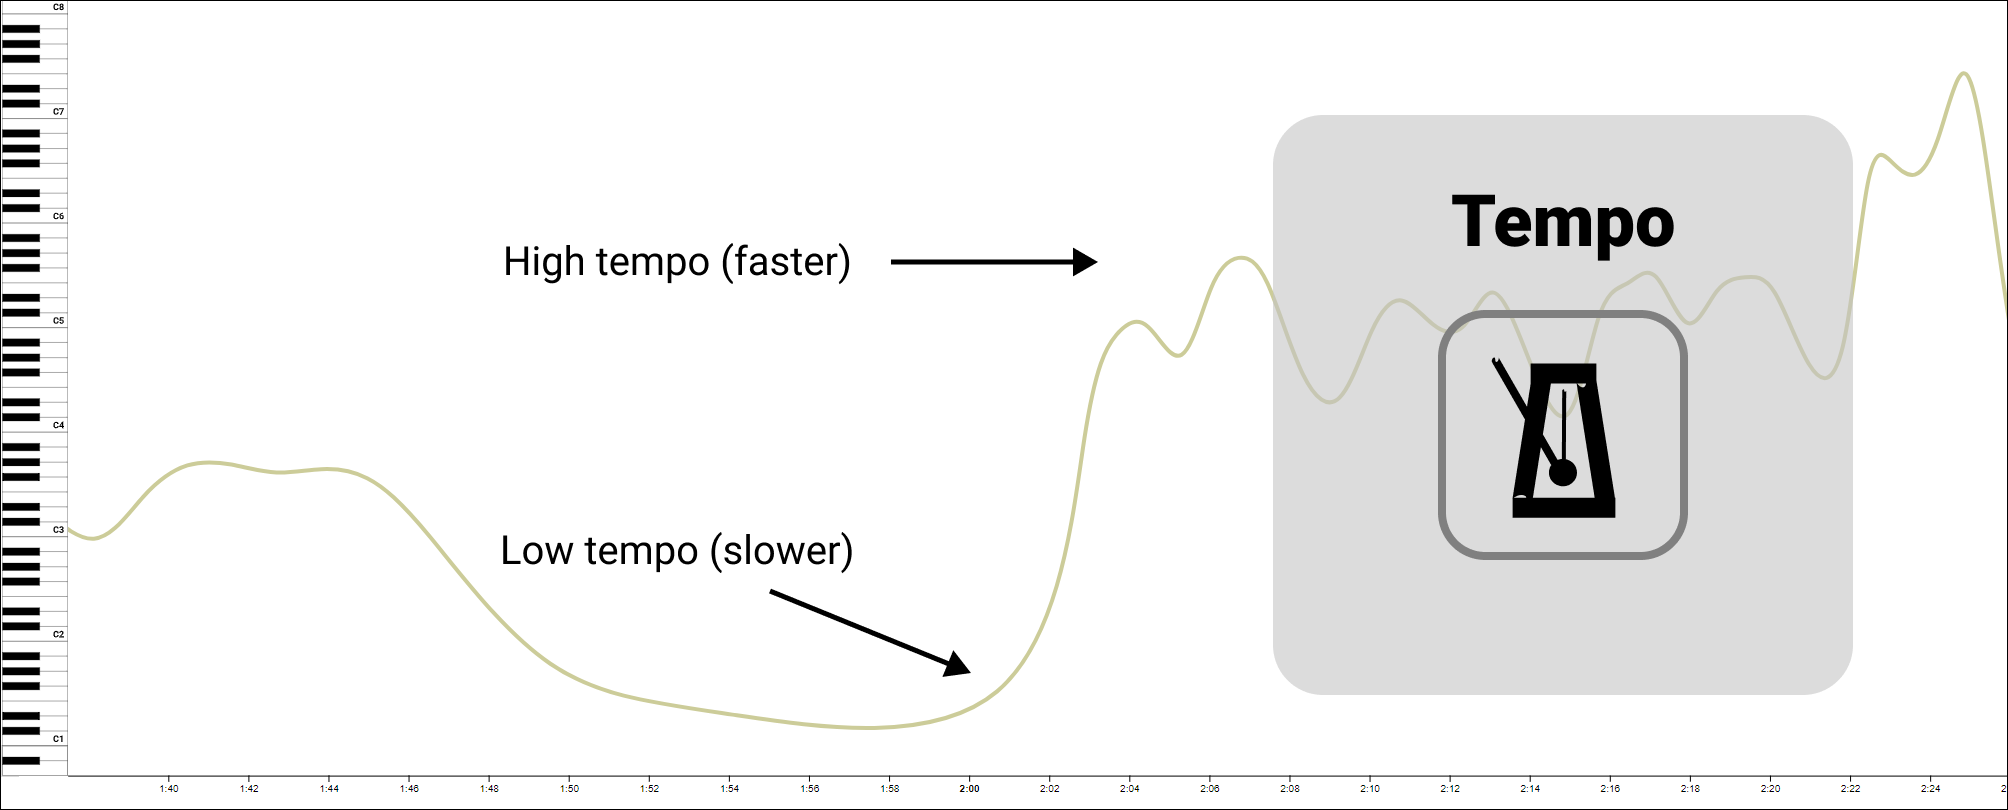
Tempo is a measure of the speed of the music, usually measured in beats per minute. A higher tempo curve means the music is faster while a lower curve represents a slow passage in the music.
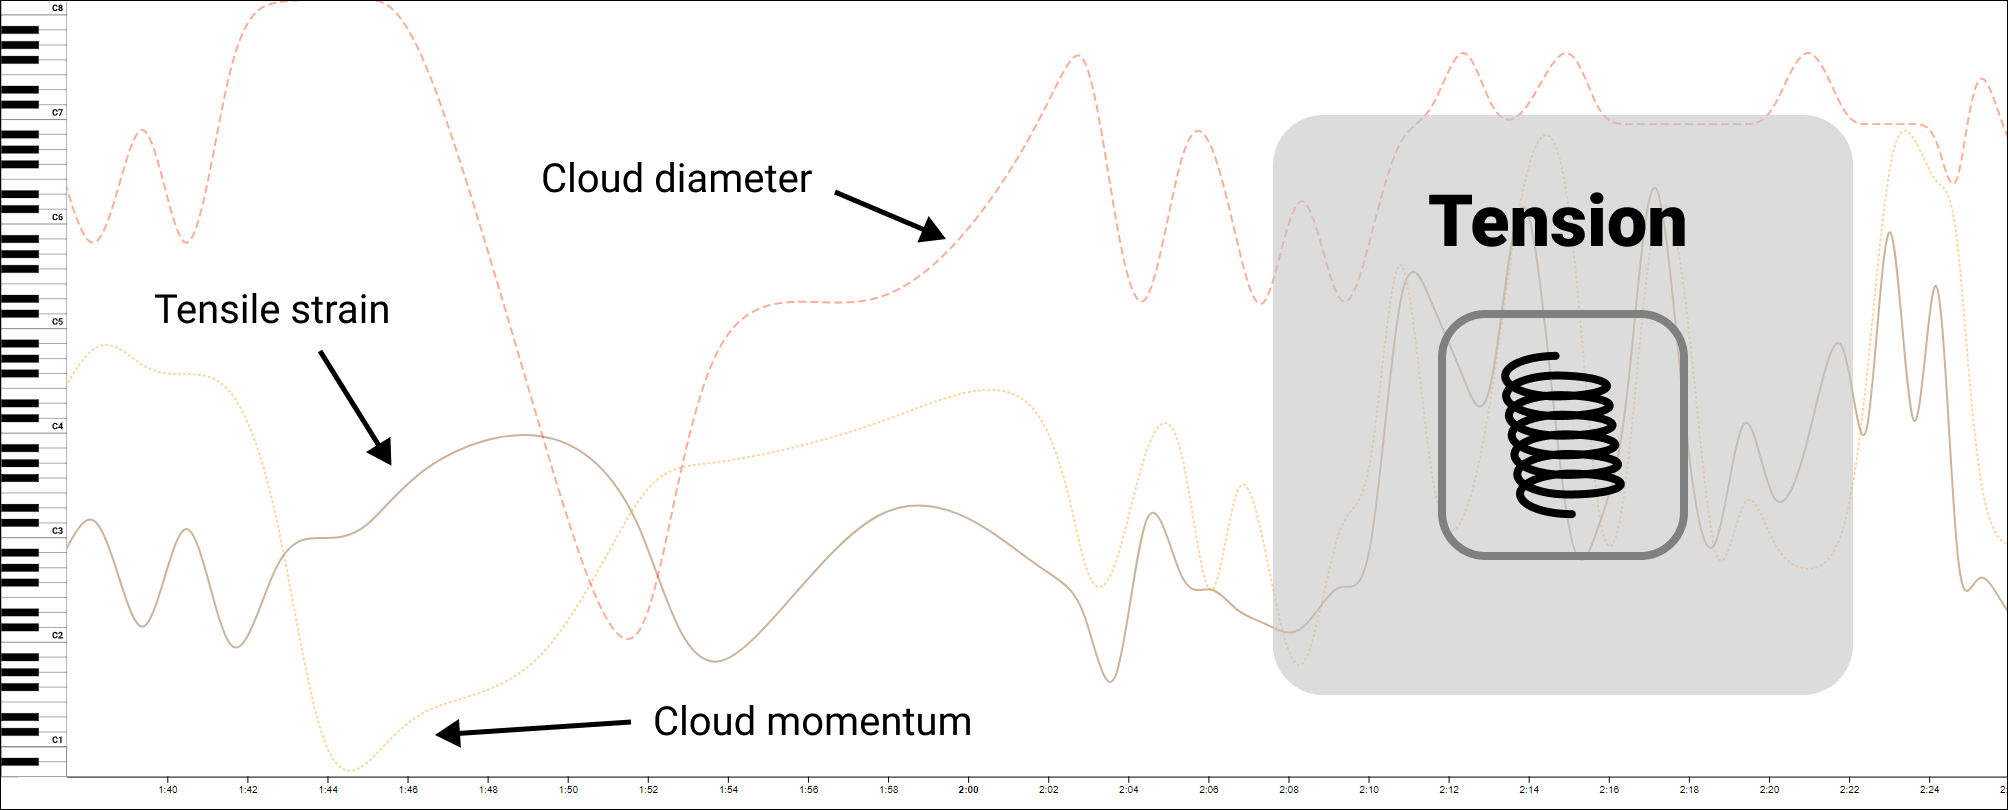
Harmonic tension captures the relationship of notes and chords to theoretical concepts in music. When the music is highly dissonant, the performer may choose to slow it down for greater effect. 3 curves are shown:
- CloudDiameter: Represents dissonance
- CloudMomentum: Measures harmonic change between chords
- TensileStrain: Measures current distance from the tonal (key) center When the music is highly dissonant, the performer may choose to slow it down for greater effect.